Appendix: How to Create Prepared VMs for Labs *
Create a Ubuntu VM on VirtualBox
Download ubuntu-20.04.2.0-desktop-amd64.iso image file from Ubuntu official website
Start VirtualBox, click New button to create an empty Ubuntu VM, assign dynamically hard disk storage to it (I set it as 30 GB)
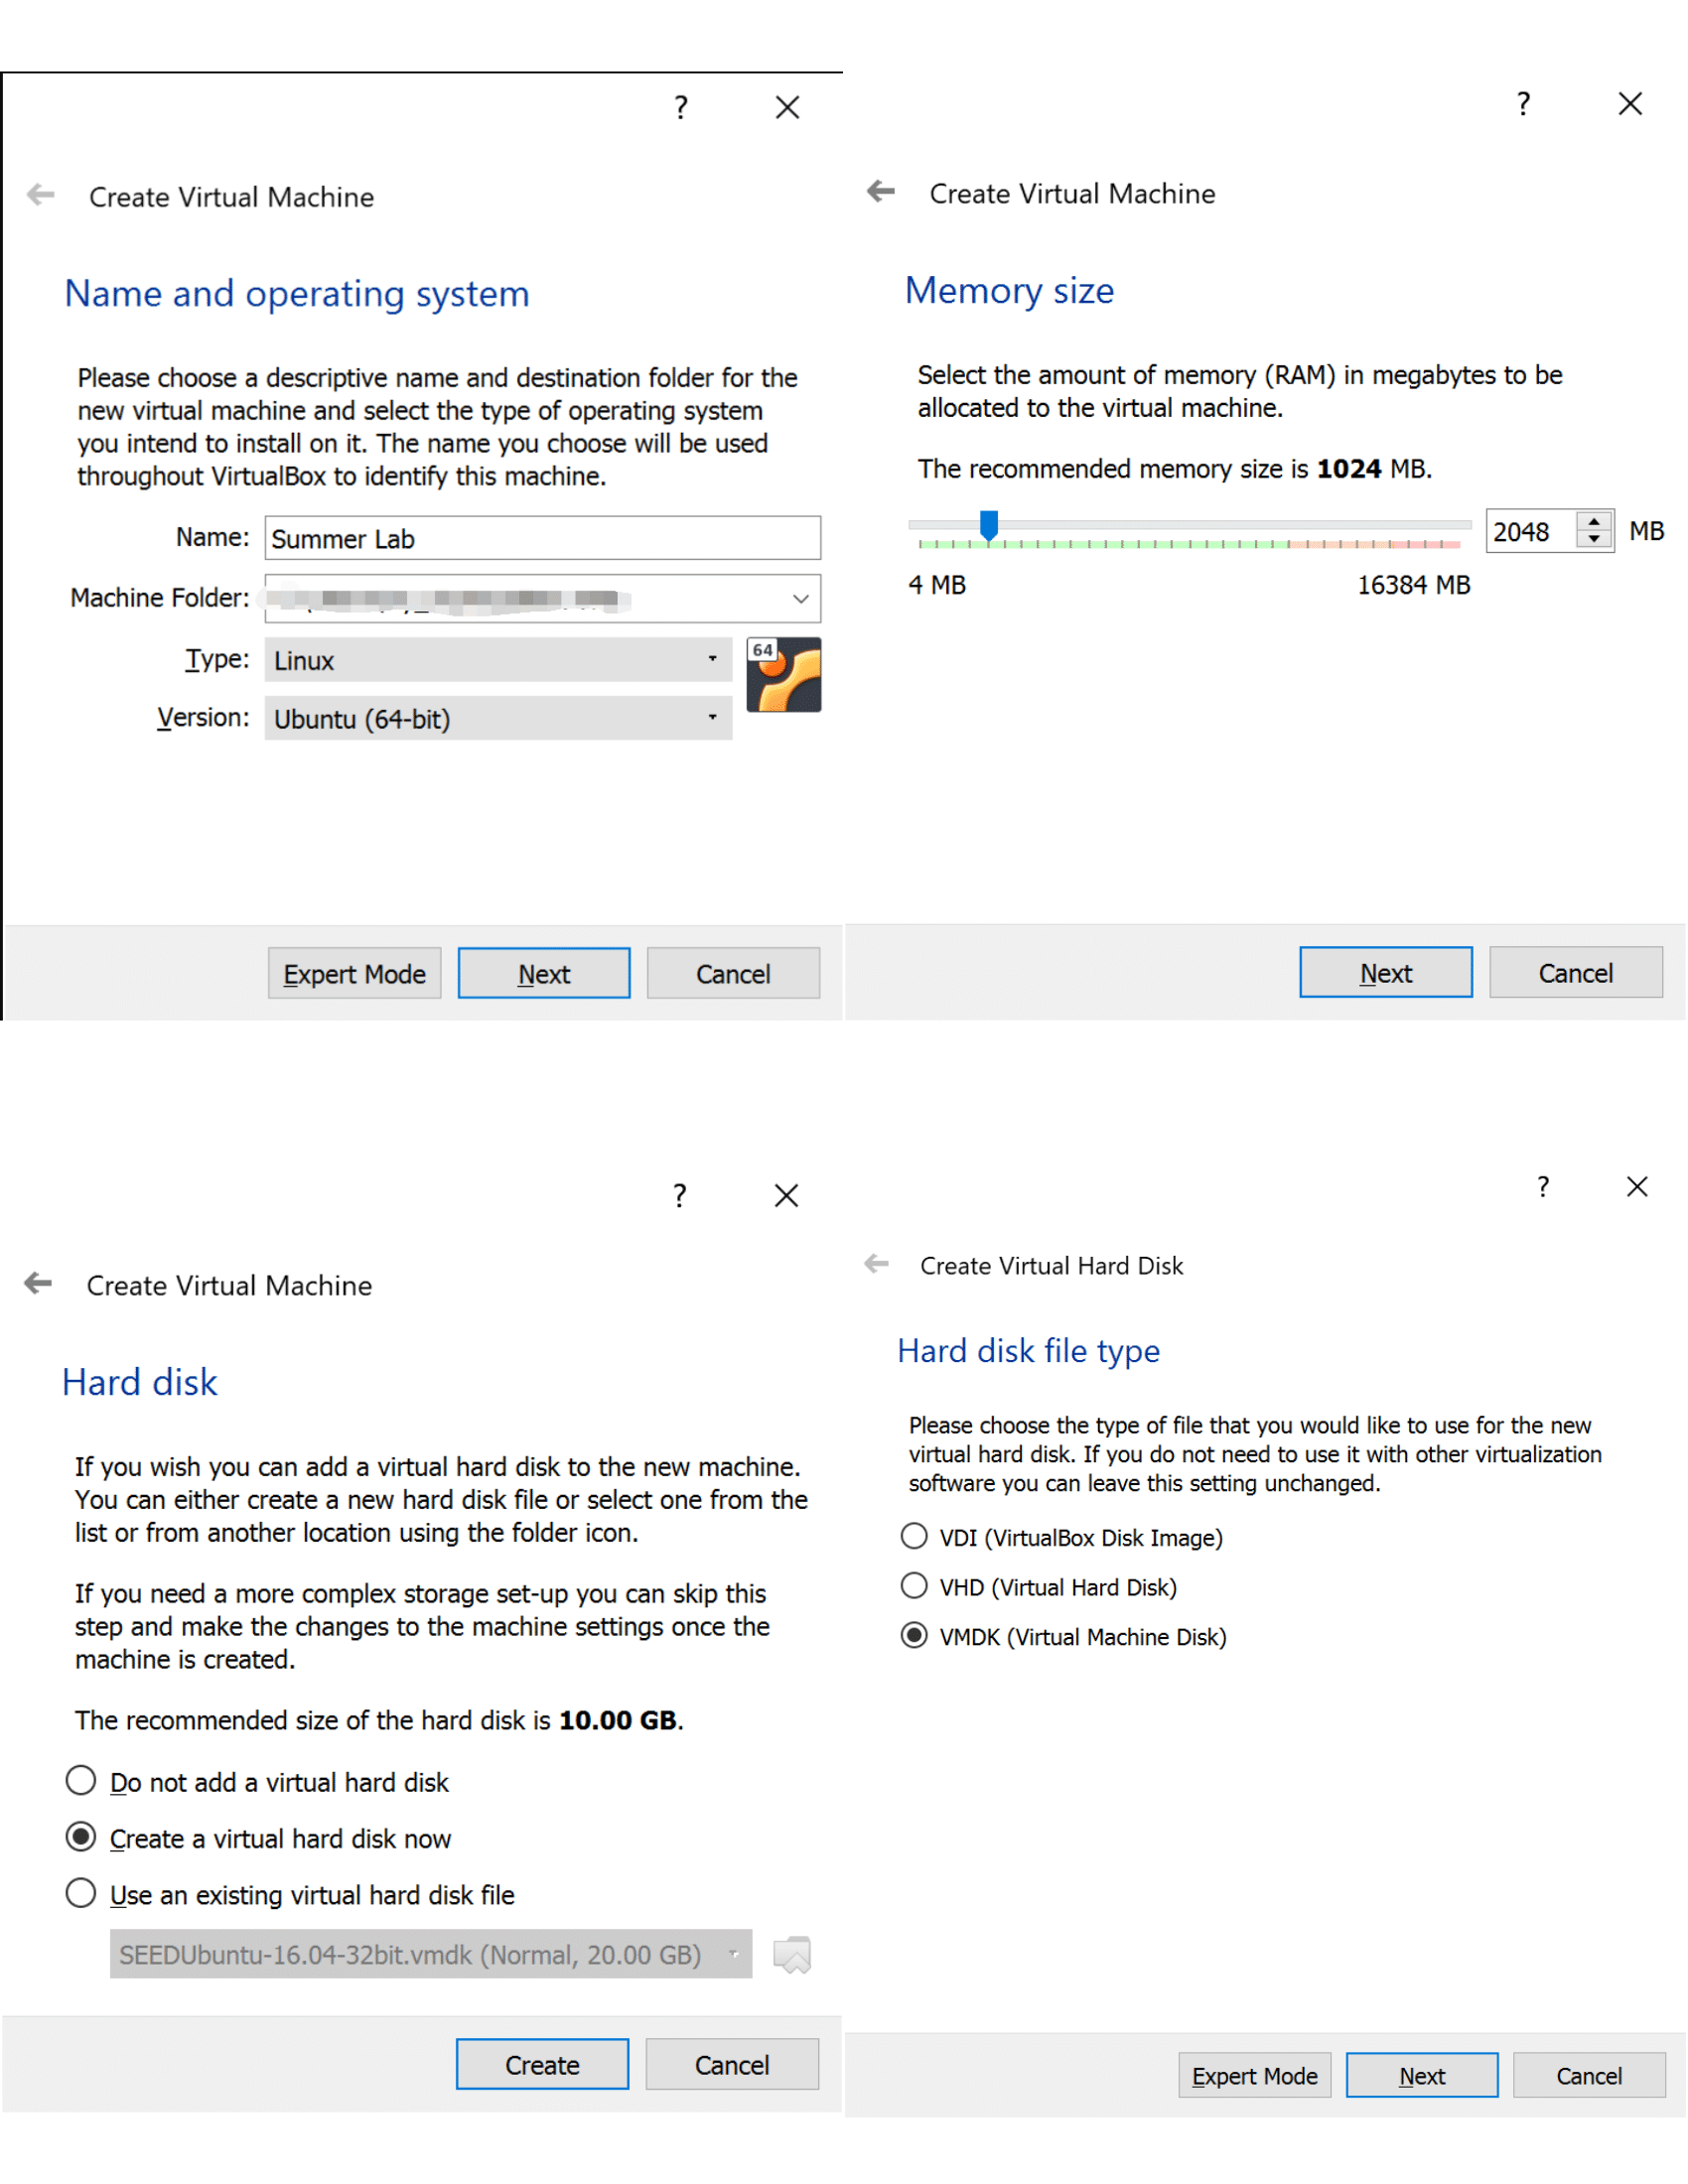
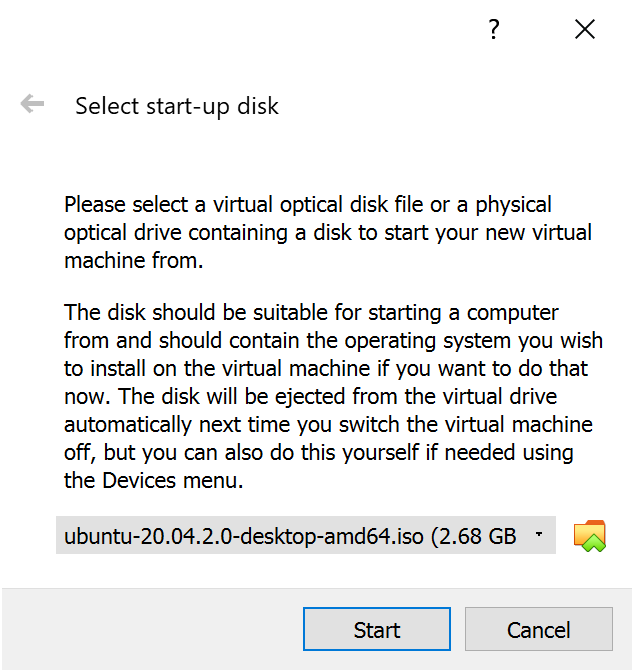
Run the newly created VM and select the image downloaded as the start-up disk.
Install Wireshark
Start a terminal and run
sudo dpkg-reconfigure wireshark-common
select yes and confirm, then run
sudo adduser $USER wireshark
Restart or log out. When you come back to this VM, you can launch Wireshark without root priviledge.
Install Docker (Optional) *
It can be used in Lab 6 and set containers up (following this manual) in case the VM environment doesn’t work for any lab.
sudo apt-get remove docker docker-engine docker.io containerd runc
sudo apt-get update
sudo apt-get install \
    apt-transport-https \
    ca-certificates \
    curl \
    gnupg \
    lsb-release
curl -fsSL https://download.docker.com/linux/ubuntu/gpg | sudo gpg --dearmor -o /usr/share/keyrings/docker-archive-keyring.gpg
echo \
  "deb [arch=amd64 signed-by=/usr/share/keyrings/docker-archive-keyring.gpg] https://download.docker.com/linux/ubuntu \
  $(lsb_release -cs) stable" | sudo tee /etc/apt/sources.list.d/docker.list > /dev/null
sudo apt-get update
sudo apt-get install docker-ce docker-ce-cli containerd.io
sudo usermod -aG docker $USER
newgrp docker
Lab 4
Install dependencies
$ sudo apt-get install git curl openssl lsb-release cmake wget python3-pip
Install Modules
$ pip3 install phe[cli] Pyfhel
Update the environment variable by:
$ sudo gedit ~/.bashrc
Append
export PATH=$HOME/.local/bin:${PATH}
export LD_LIBRARY_PATH="/usr/lib/x86_64-linux-gnu/:${LD_LIBRARY_PATH}"
to the end of the file.
Lab 3
Clone openabe
git clone https://github.com/zeutro/openabe
Set ZROOT (otherwise, bison cannot be found during building)
export ZROOT=${HOME}/openabe
In case it cannot fetch gtest by curl, run
sudo apt-get install ca-certificates
printf "\nca_directory=/etc/ssl/certs/" | sudo tee -a /etc/wgetrc
to add the CA certificates. Then open the directory and build openabe
cd openabe
sudo -E ./deps/install_pkgs.sh
. ./env
make
sudo -E make install
Error
Network manager on the VM may fail after changing openssl on it, you can fix it by the same operations in this answer and restart the VM
Lab 7
Install Metasploit framework:
curl https://raw.githubusercontent.com/rapid7/metasploit-omnibus/master/config/templates/metasploit-framework-wrappers/msfupdate.erb > msfinstall
Install adb
sudo apt install adb
Lab 6
Clone only Android.Spy.277.origin folder of android-malware collection. The information about them can be found in this post.
mkdir android-malware
cd android-malware
wget https://github.com/ashishb/android-malware/raw/master/unclassified_apks/com.squareup.apk
Install FlowDroid
sudo apt-get install openjdk-8-jdk openjdk-8-jre
wget https://github.com/secure-software-engineering/FlowDroid/releases/download/v2.8/soot-infoflow-cmd-jar-with-dependencies.jar
Download SourcesAndSinks.txt from the lab manual.
wget https://raw.githubusercontent.com/secure-software-engineering/FlowDroid/develop/soot-infoflow-android/SourcesAndSinks.txt
Test
docker run --volume=$HOME/android-malware:/apks alexmyg/andropytool -s /apks/ -vt <my-vt-key> -all
Create an Android VM
Download android-x86_64-7.1-r5.iso iamge from the official website.
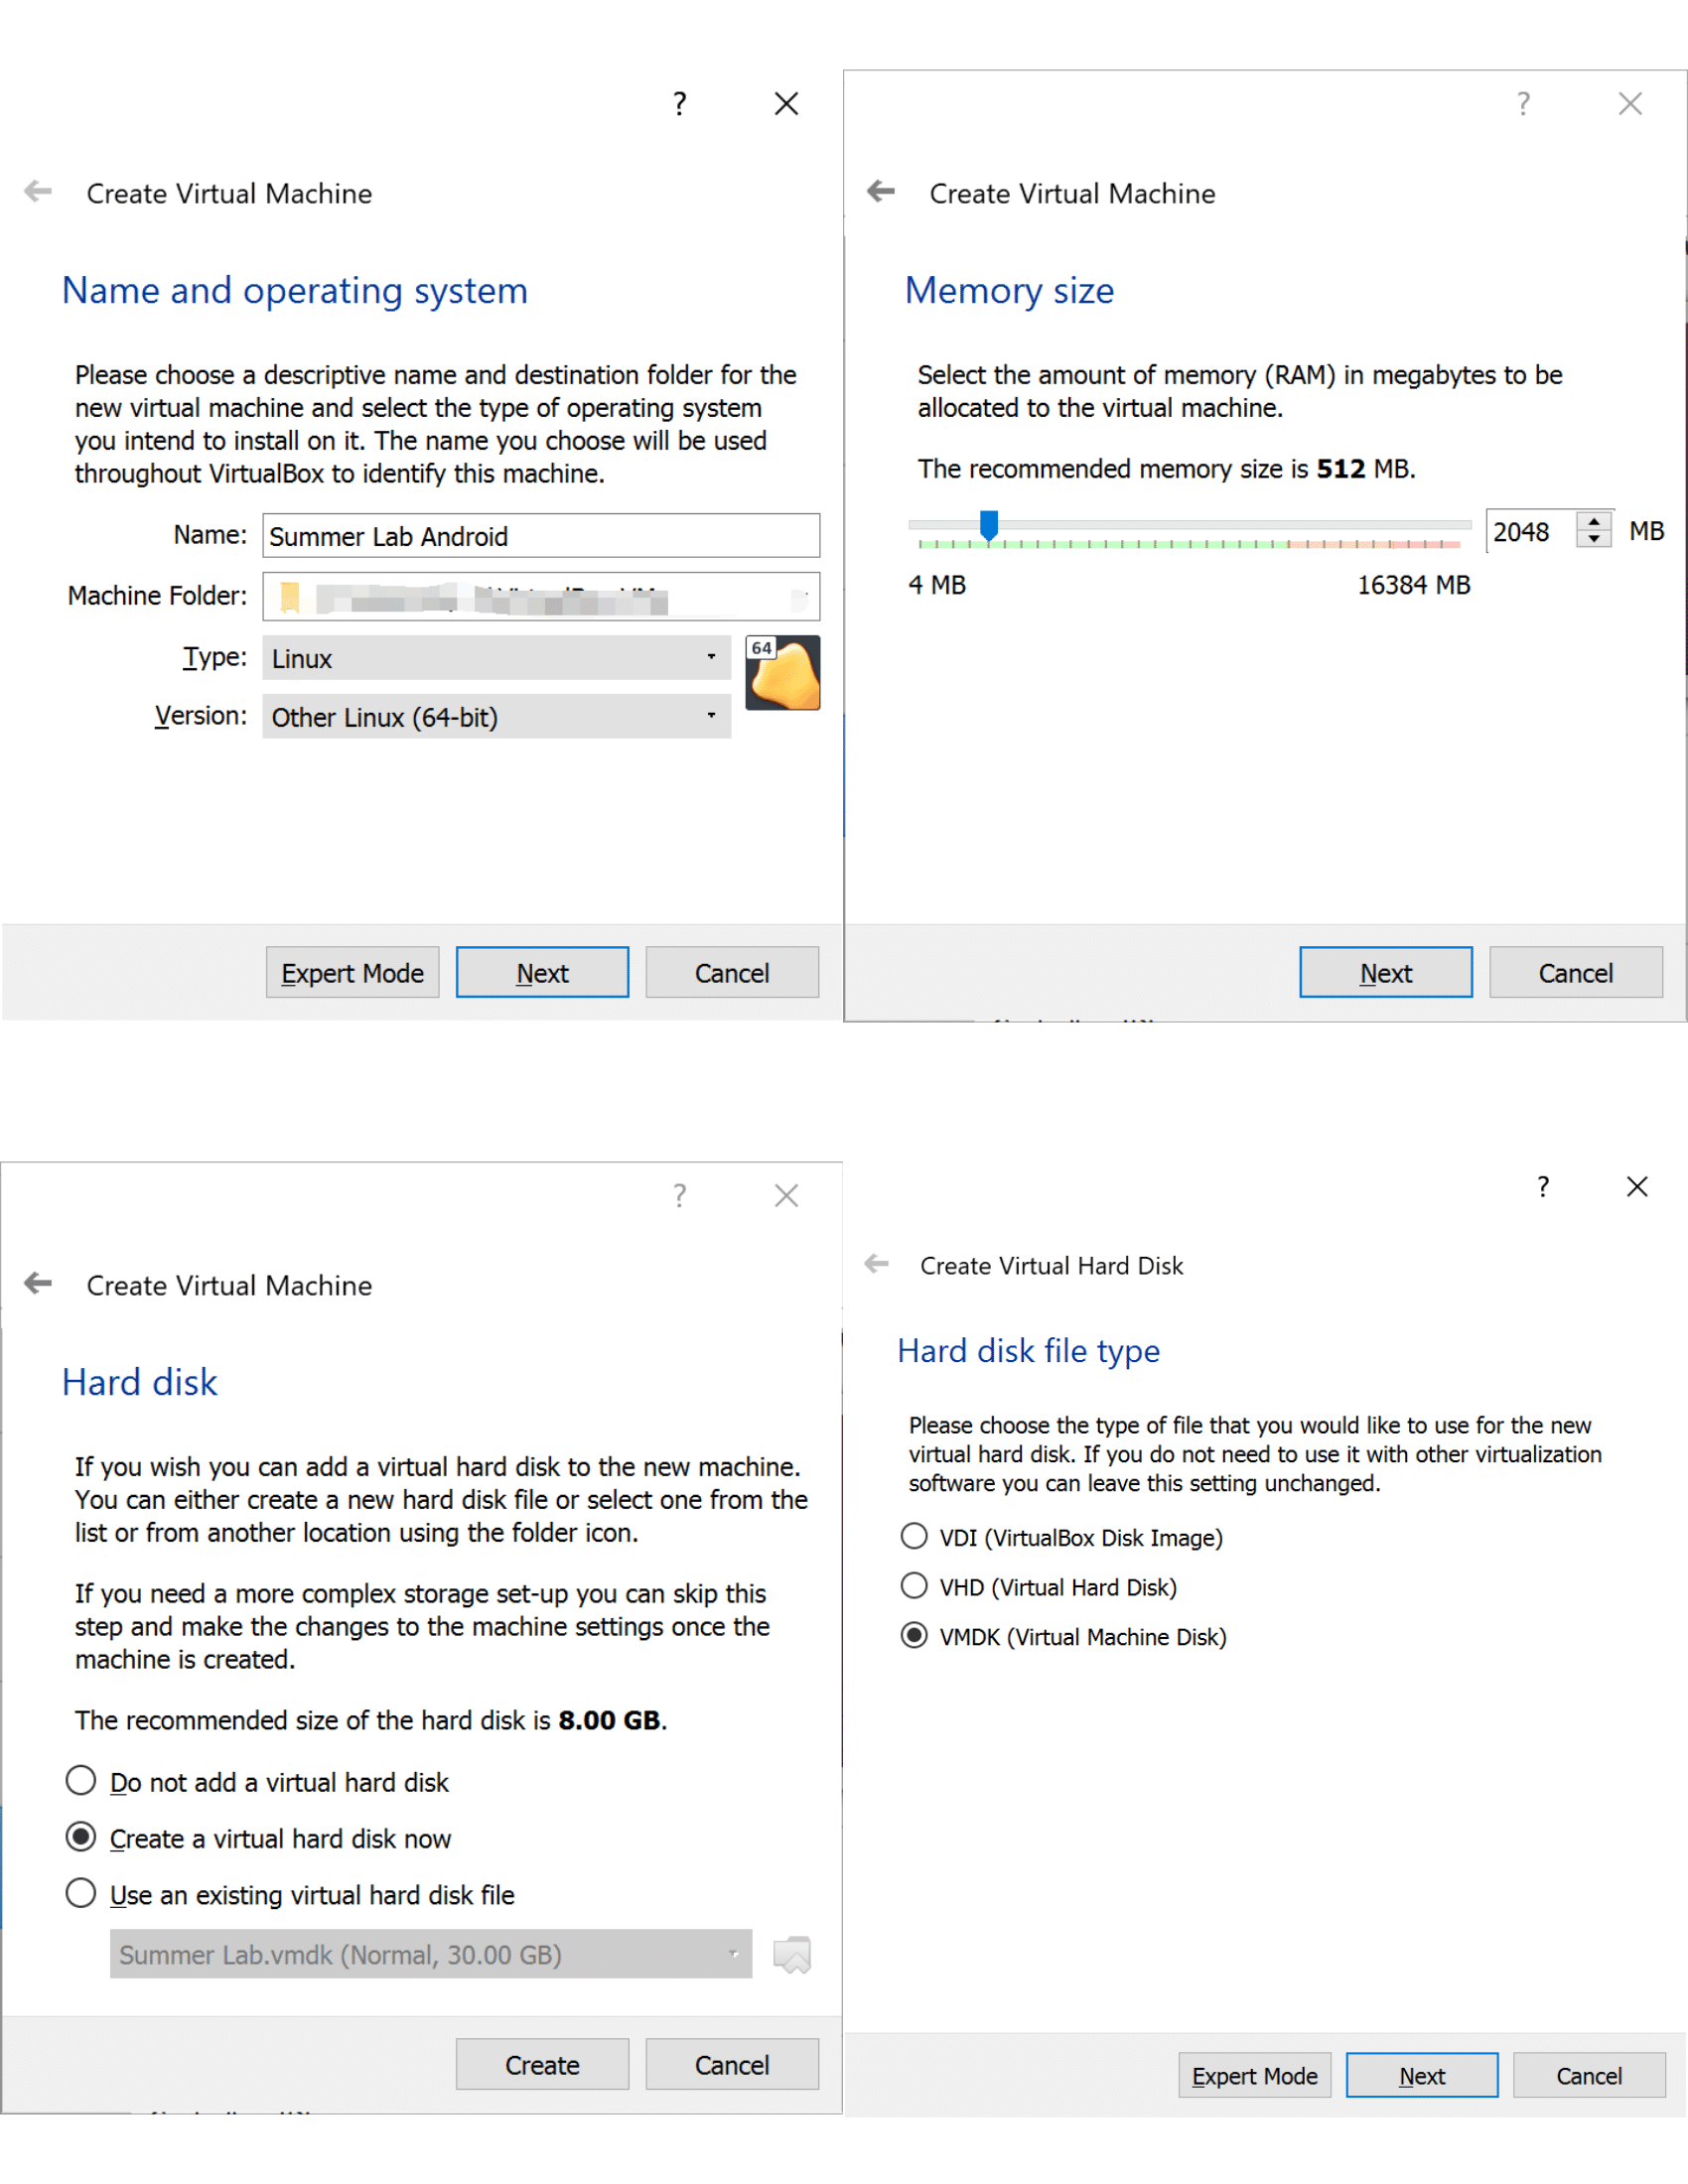
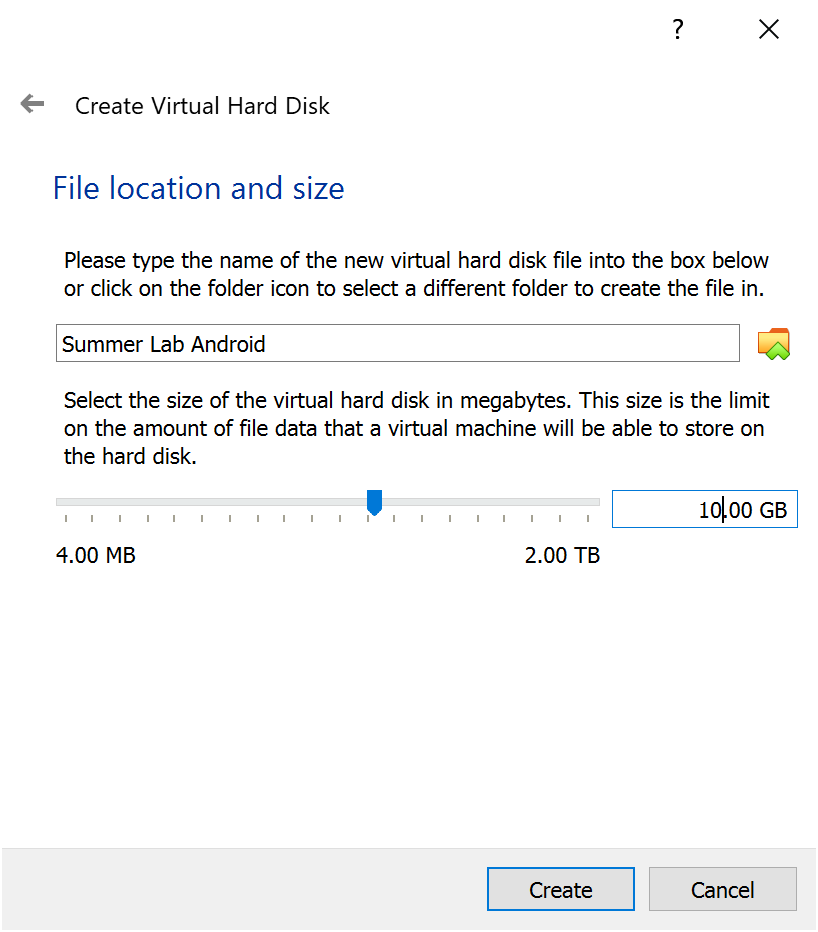
Choose dynamically allocated storage and allocate 10GB as its hard disk space.
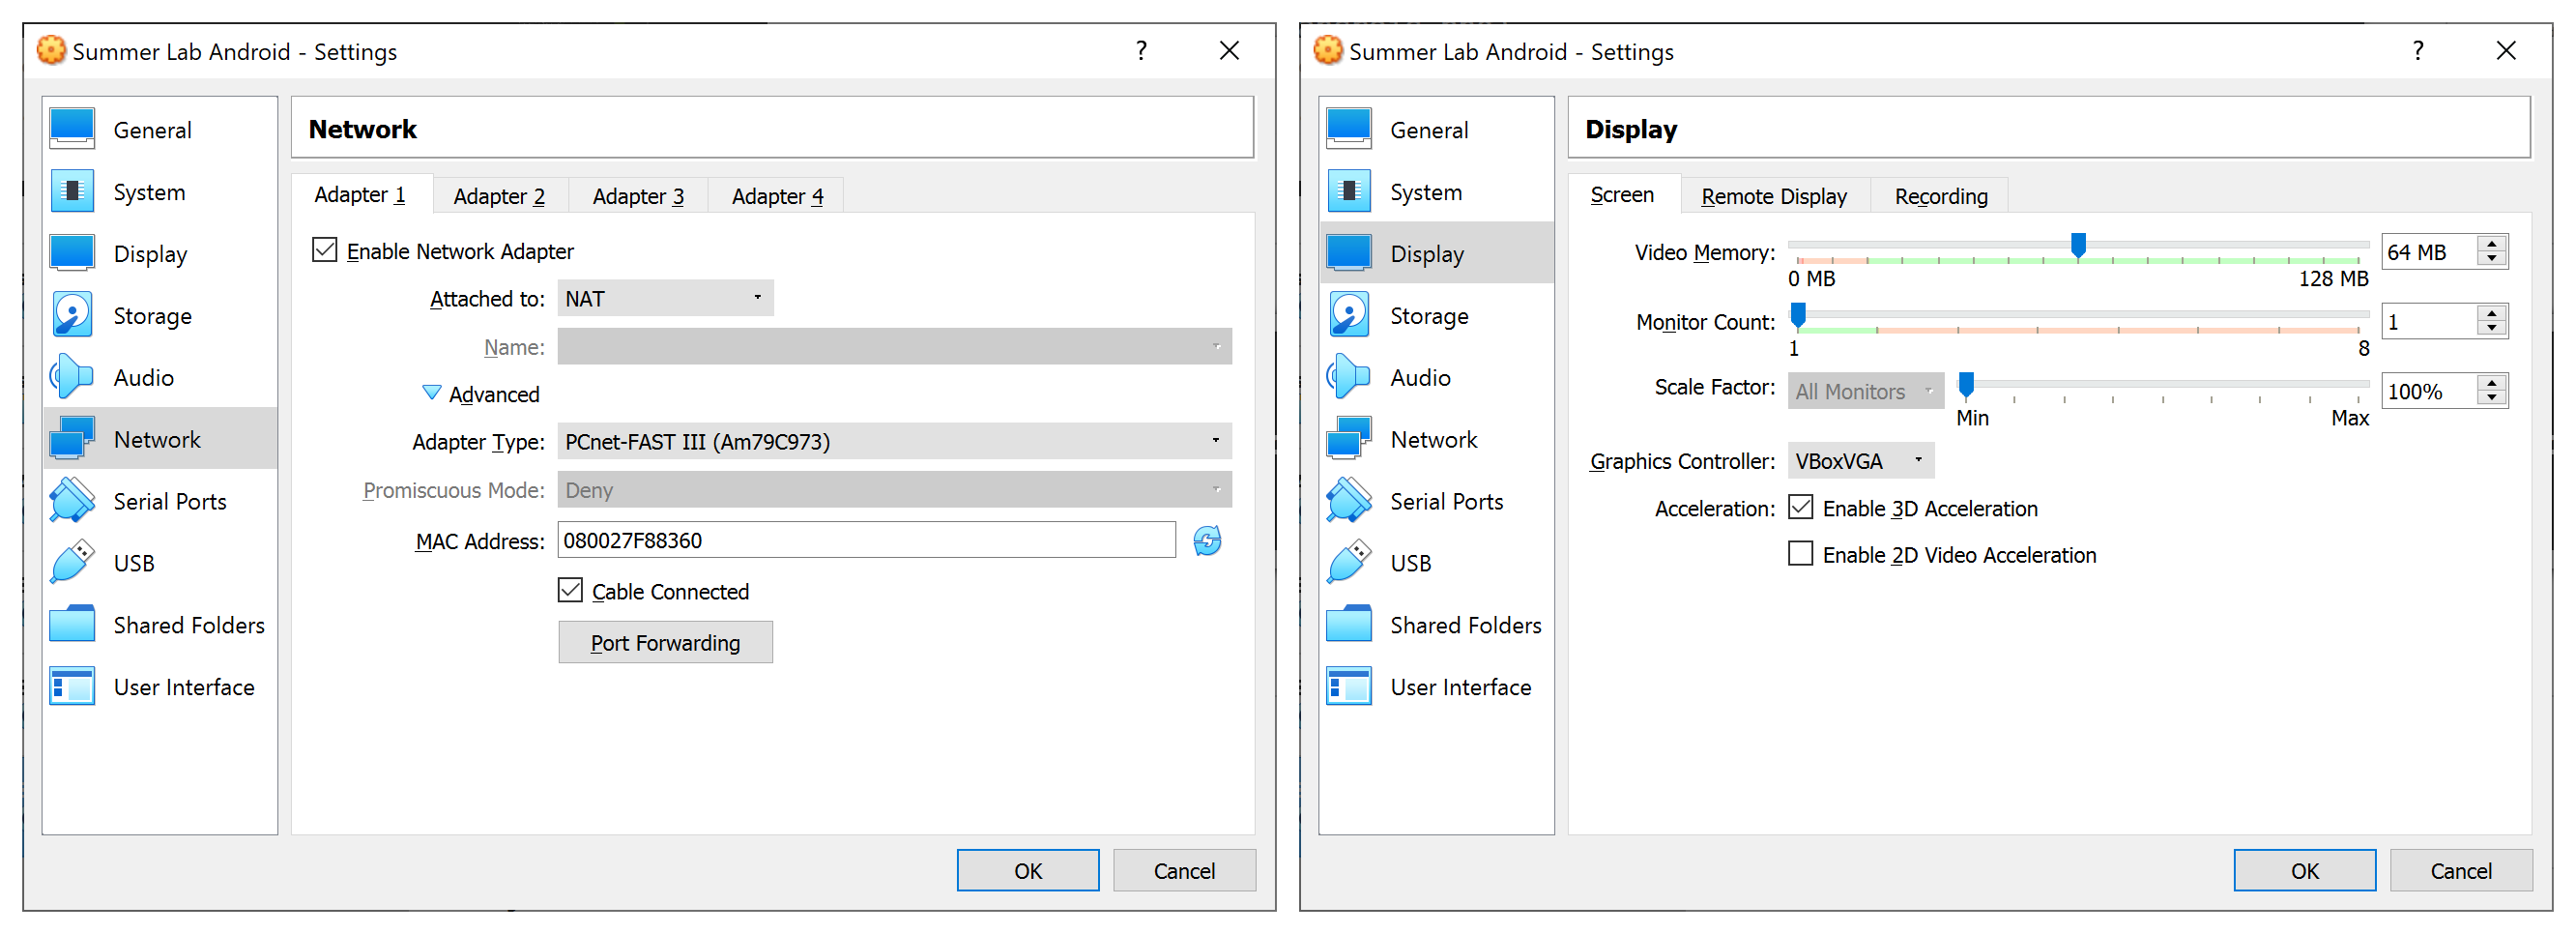
Set its display and network:
Display: Select
VBoxVGAas graphics cotroller, check “enable 3D acceleration”Network: Attach to
NAT, select adapter tye asPCNet Fast III, and check “Cable connected”.
Start the VM, Load android-x86_64-7.1-r5.iso as start-up disk.
Select “Advanced options” -> “Auto Installation” -> “Create/Modify partitions” -> “Run Android-x86”
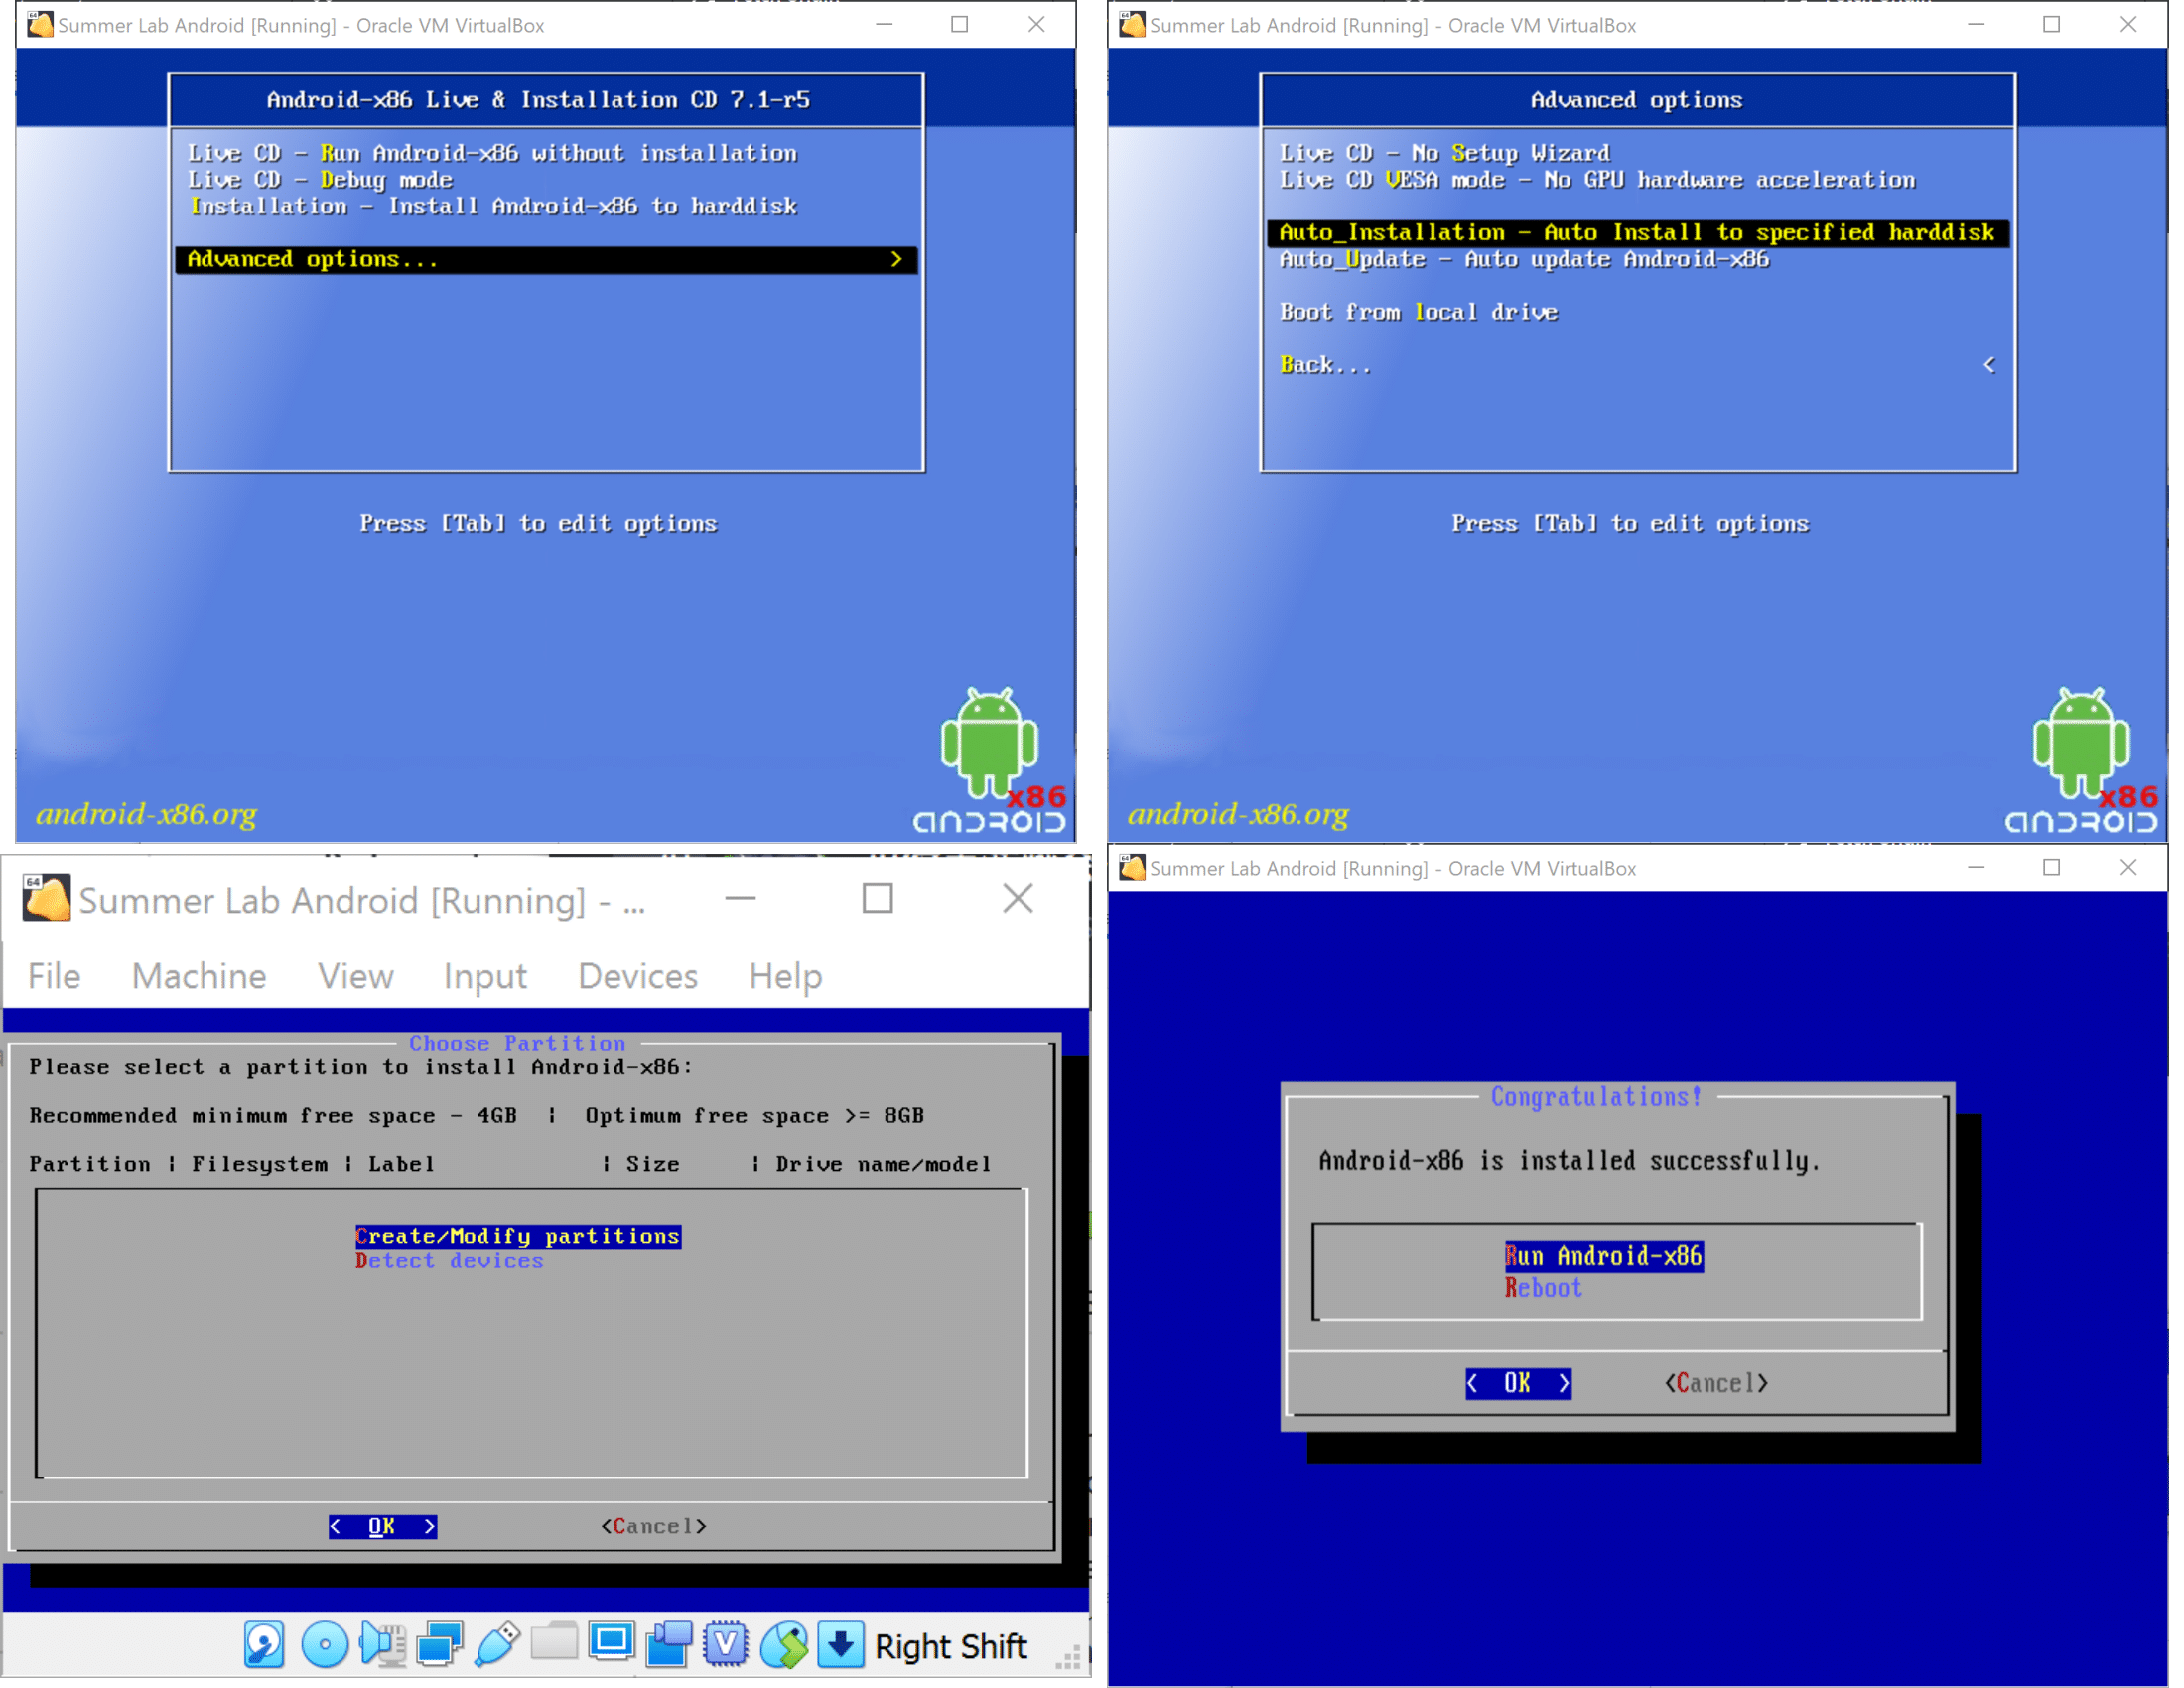
After installing Android OS, it requires you set up some initial settings, you can simply skip it and use default settings.
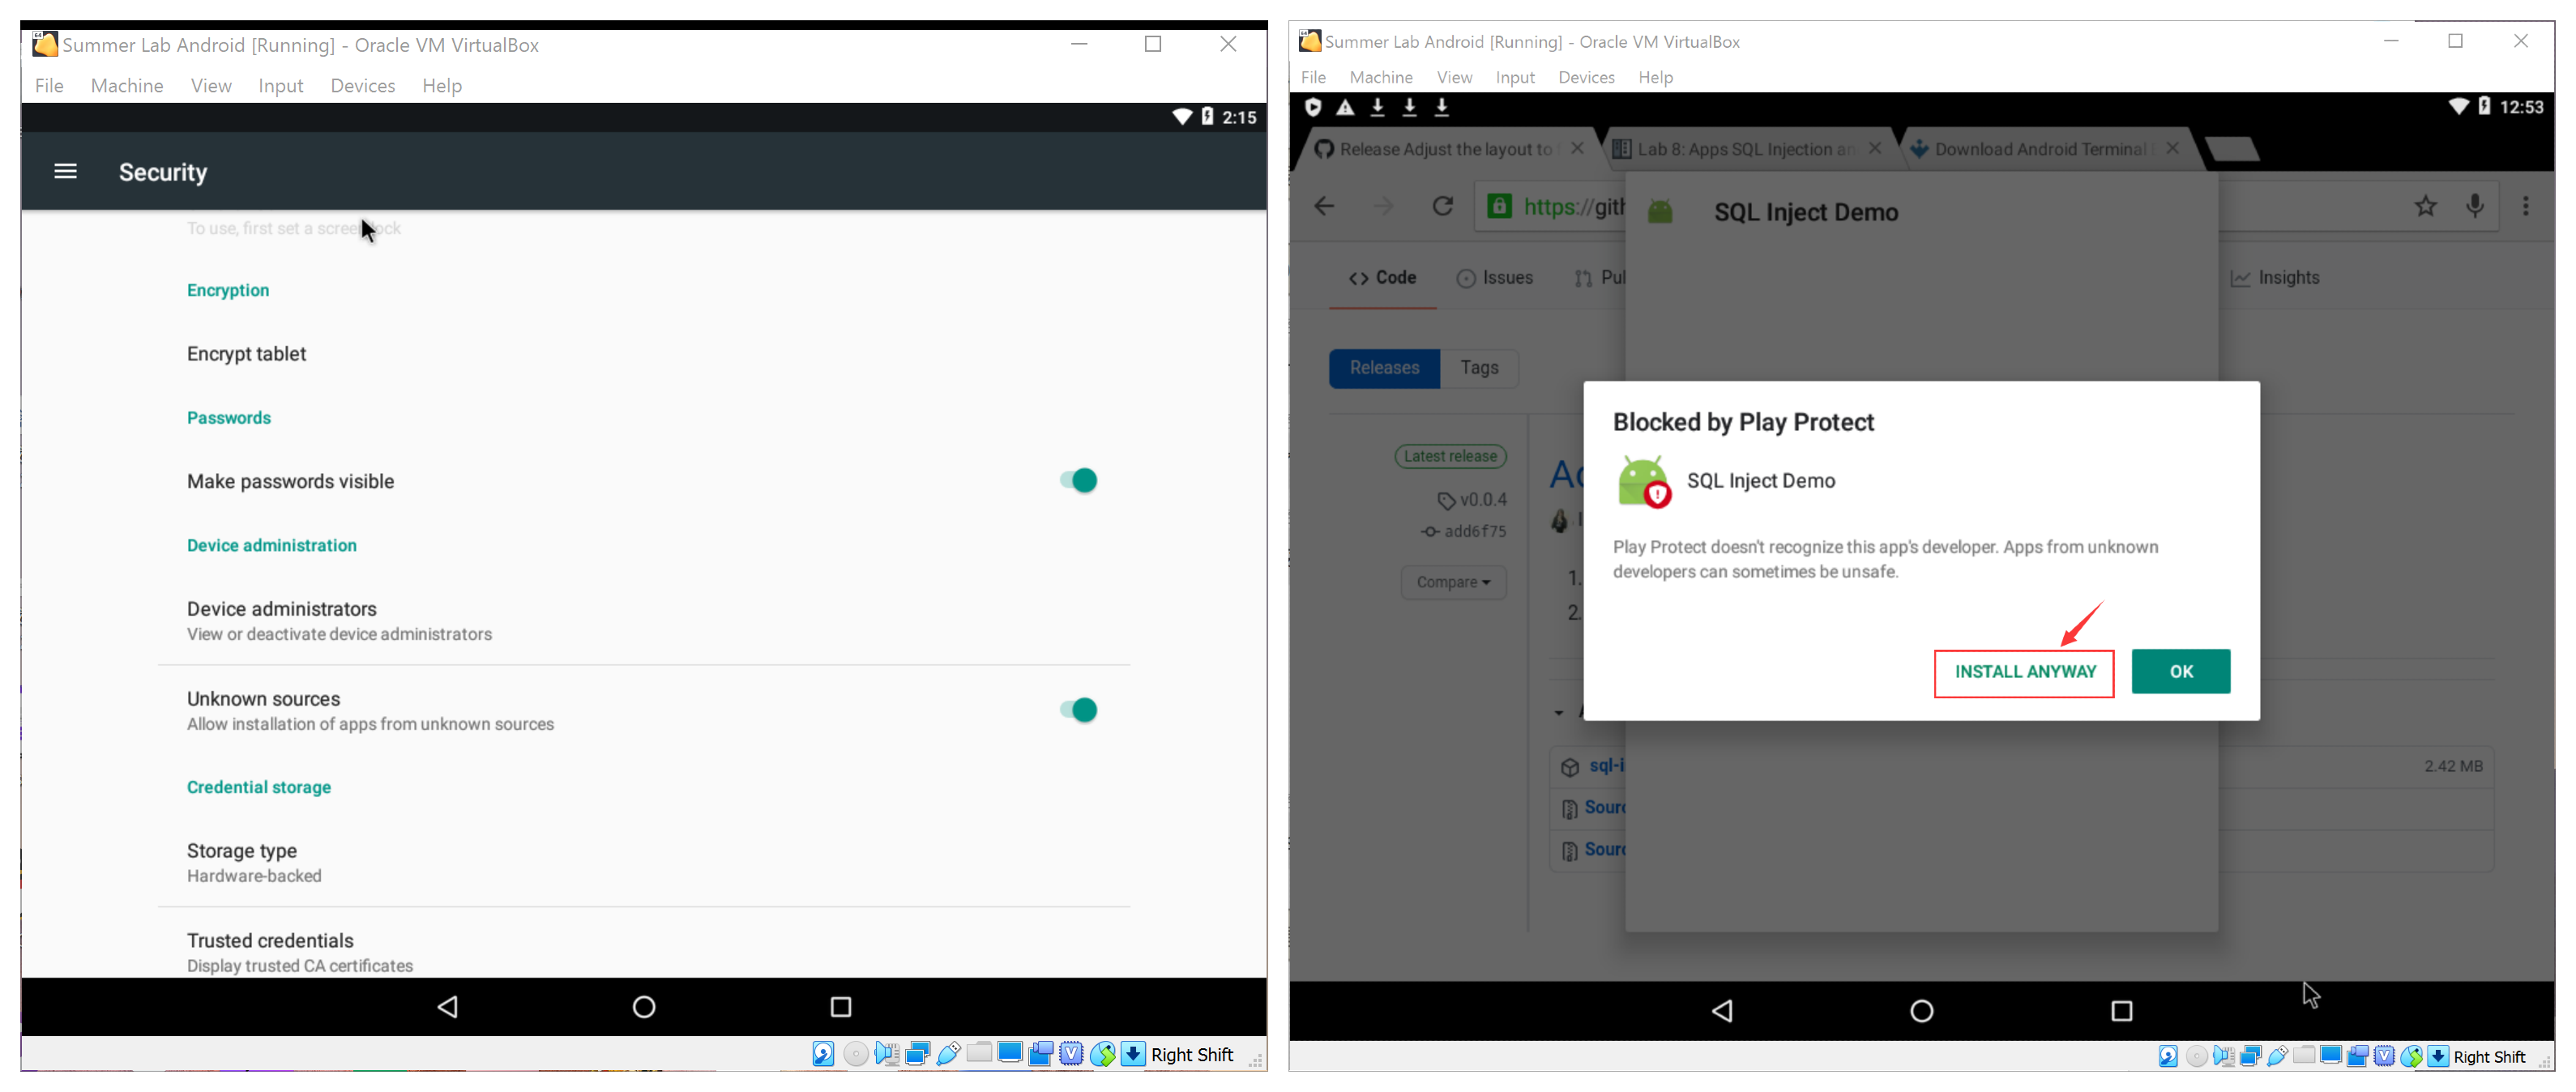
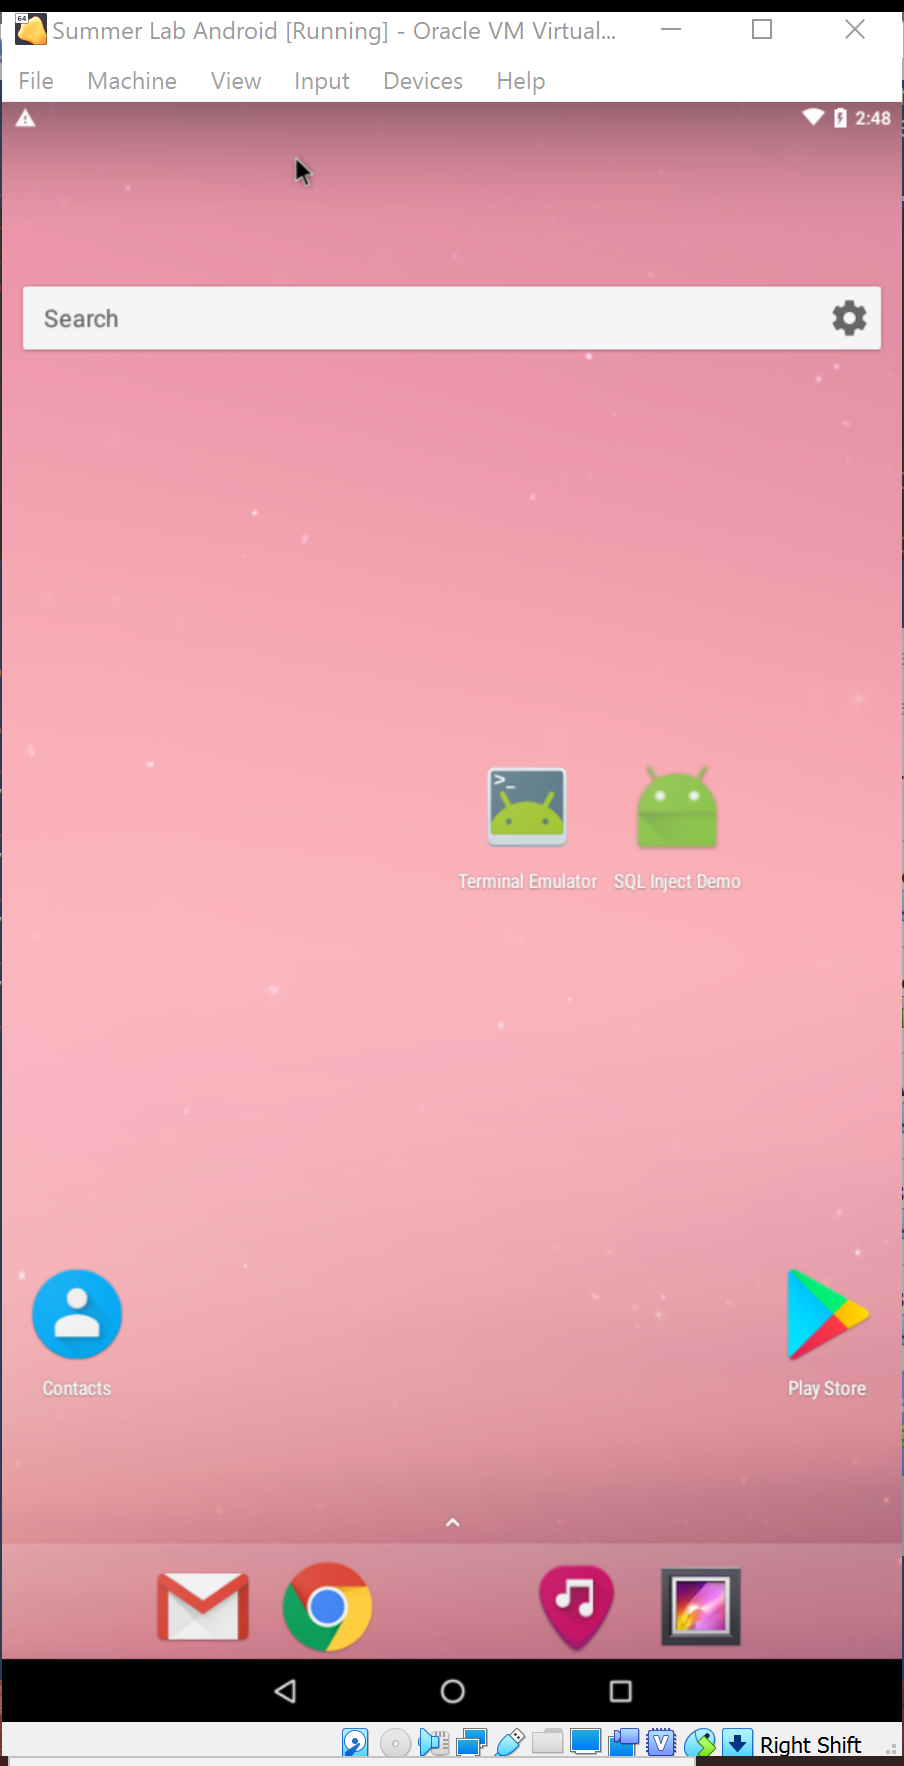
After entering the home screen, check “Unknown source” in “Settings” -> “Secure” to allow you install .apk from Internet. Turn off the Play Store Protection from “Play Store” -> “Settings”:

Open Chrome browser app on it, download apks:
For Lab 7: Android Terminal Emulator
For Lab 8: SQL Inject Demo
Choose “open” once finishing the download, it will ask you whether to install the downloaded apks automatically, confirm and install them anyway.
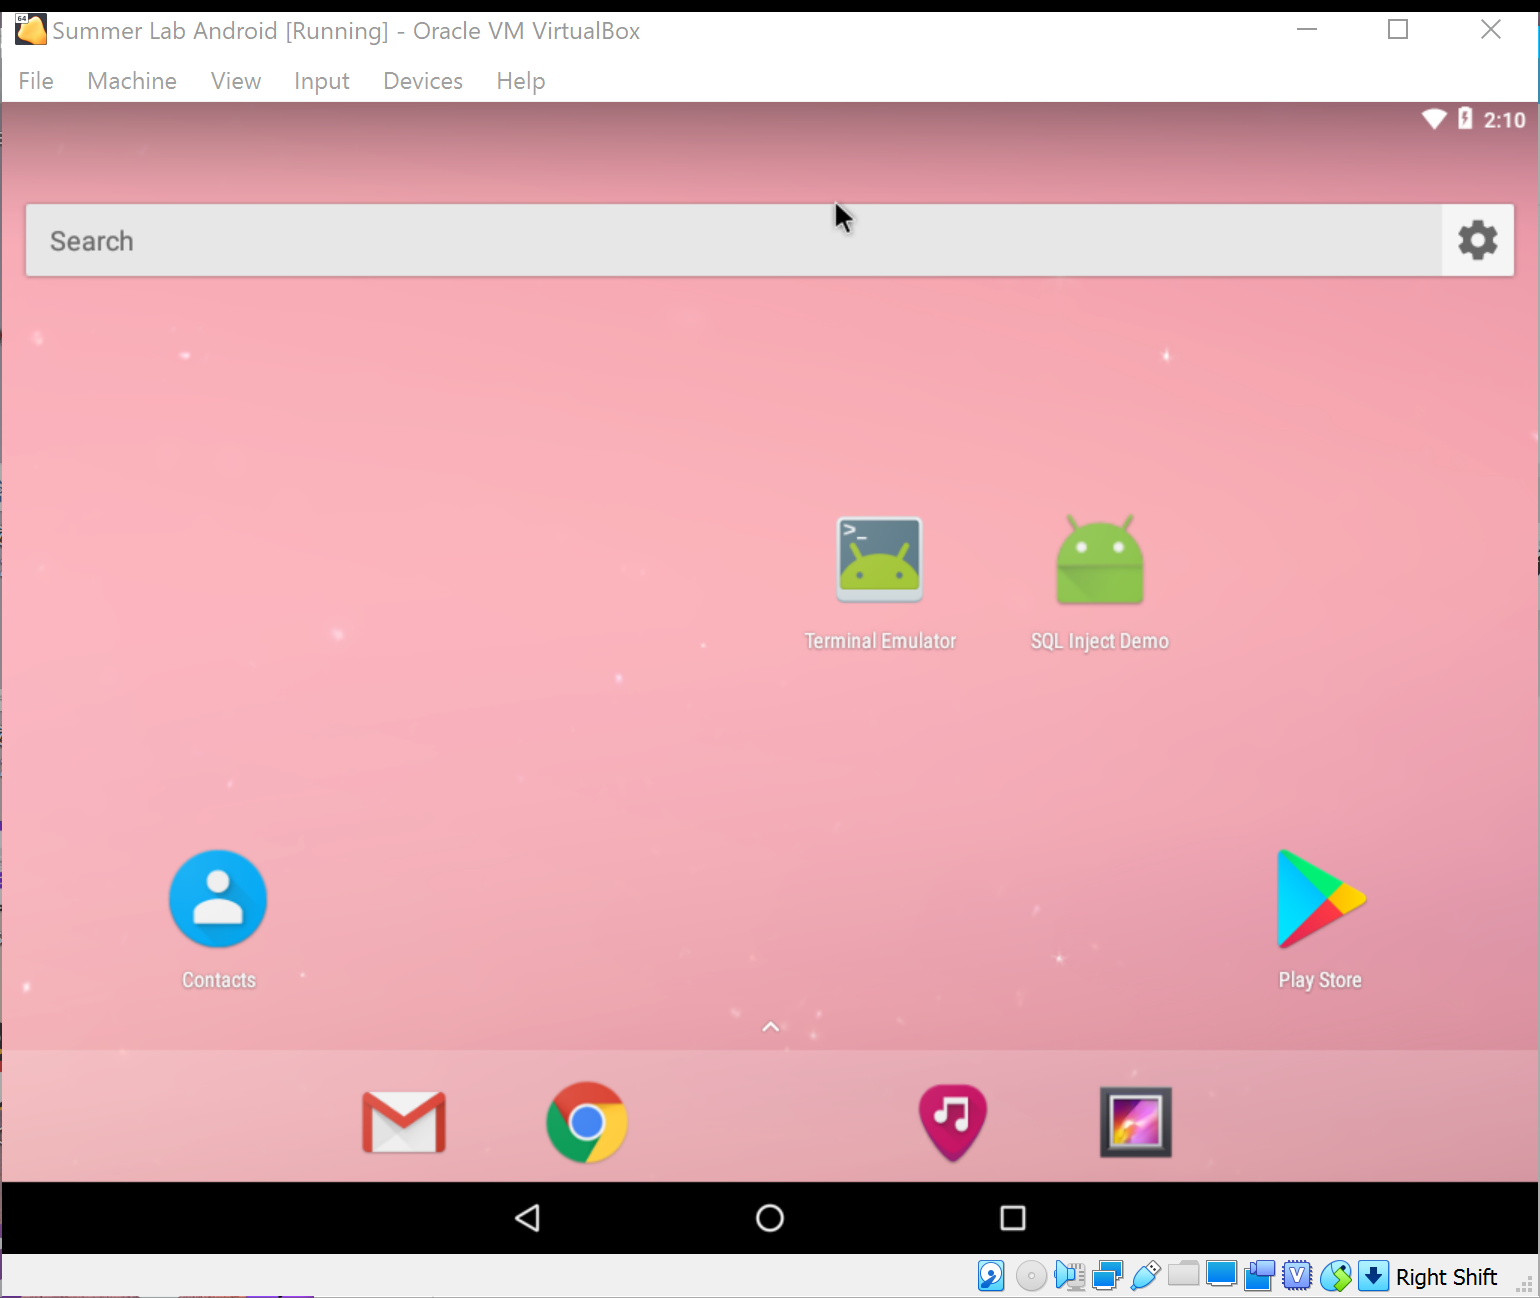
Drog the two apps to the home screen, finally we get such an Android VM:
Optional: Change the Screen Size *
To make it looks more like a phone in portrait oriention mode, we may modify its
screen resolution as 600*1080*32 and fit VirtualBox viewer. (see this video as well)
Find the location where VirtulBox installed on your Windows Desktop (C:\Program Files\Oracle\VirtualBox by default), check if VBoxManage.exe is there. If it is, start a command-line tool (e.g. PowerShell) in that directory and run:
.\VBoxManage.exe setextradata "Summer Lab Android" "CustomVideoMode1" "600x1080x32"

Enter “debug mode” when starting the VM, press Enter and waitting for the output stops. Then run
mount -o remount,rw /mnt
cd /mnt/grub
Modify menu.lst by
vi menu.lst
Add vga=ask (press i to insert) after first “quiet root=/dev/ram0” and save it (first :wq and hit Enter).
Reboot:
reboot -f
It will ask you about which video mode to select each time you start the Android VM.
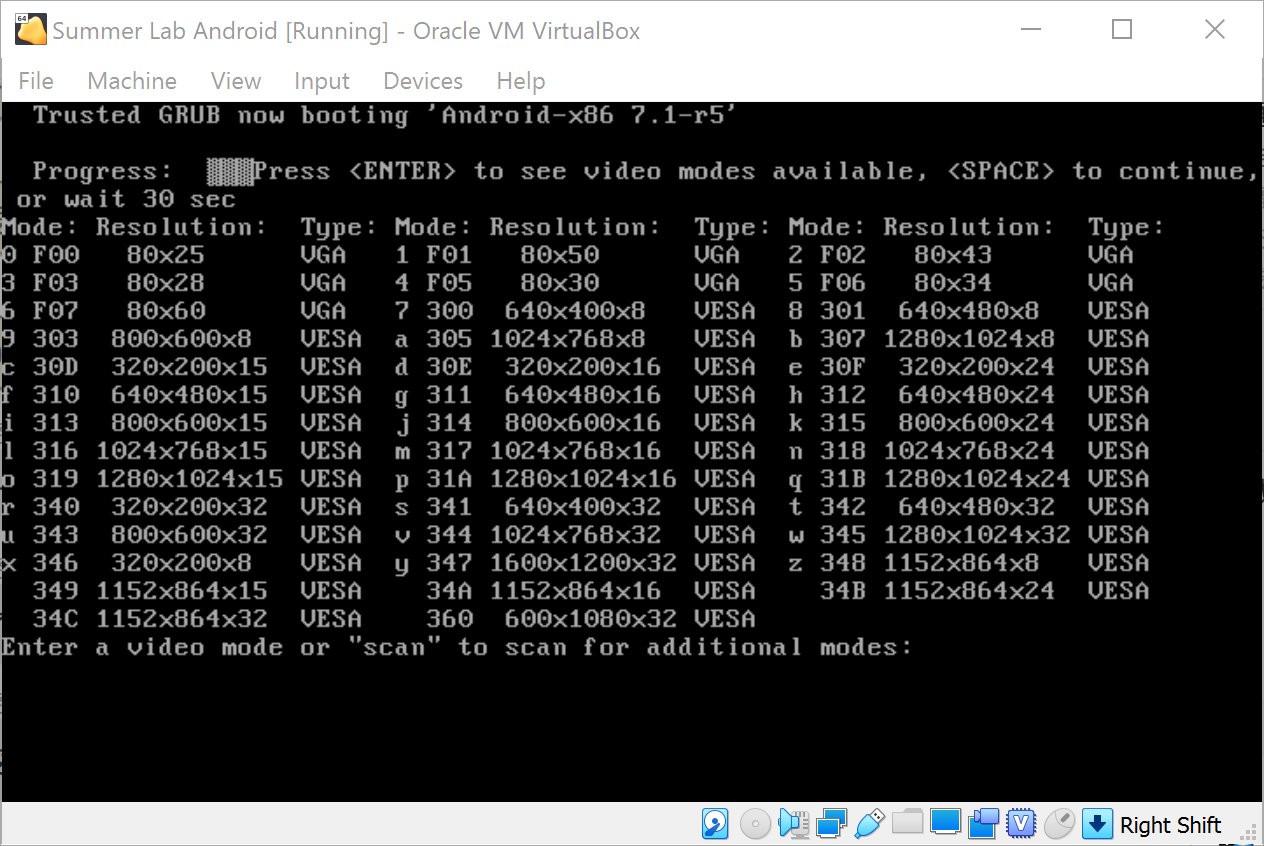
Select the last one (360) and you will enter a portrait screen:
If the VirtualBox window doesn’t fit the screen you can modify the scale in View menu. Now you can also modify menu.lst with VGA=864 (360 is in hex-format, its dec value is 864), after that it will become 600*1080*32 by default in case you are tired of choosing the screen resolution every time.
Create a Minimal Ubuntun VM
Follow Create a Ubuntu VM on VirtualBox above, in which only Docker and Wireshark.